
There's been a lot of talk about having a tutorial, or if any exist. So, here's my attempt at one. This will hopefully provide enough information for one to successfully assemble a VZ-58 using a receiver and FCG parts supplied from Ohio Rapid Fire.
This is simply the method I used to put my first VZ-58 together, so it was a learning experience for me. Take my experience and adapt it to use as you see fit. I am not claiming that it must be done exactly like I'm doing it, as with any build tutorial, your experience can and often will be a bit different. Feel free to add any additional information to this thread, as I am sure I have not covered everything in as much detail as some people might want or need. And keep in mind, this was my attempt at building one with very little info to go by, and just kinda made it up as I went along. My method is not set in stone, and should be adapted to fit YOUR individual needs.
The parts kit came from centerfire back when they were selling for 50 bucks
![Image]()
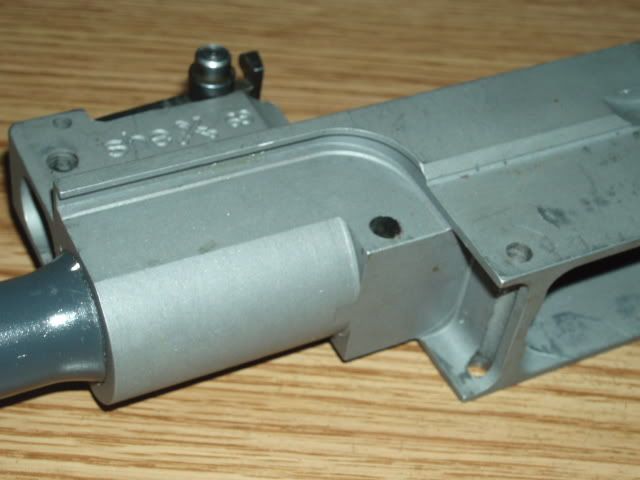
The first step I did was to remove the barrel, the gas piston stop, and the rear sight from the cut receiver stub.
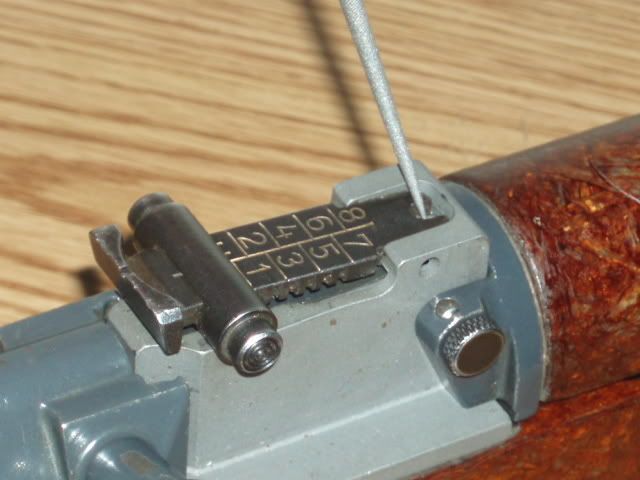
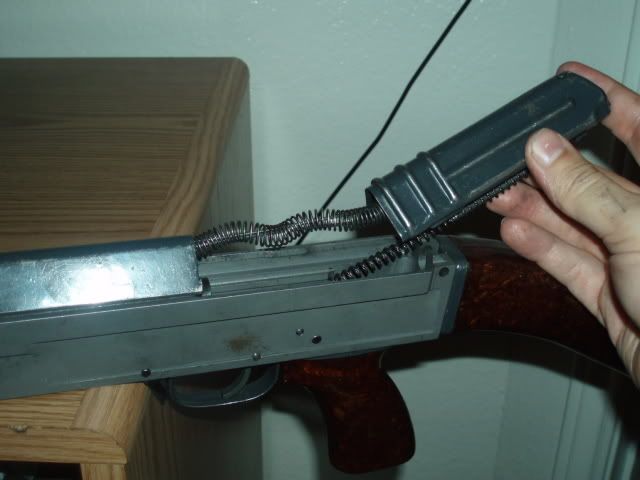
To remove the rear sight, press the spring down, and pull the sight back and out--very typical to an AK. You'll want to support the stub in a vice or something, as it can take quite a bit of pressure to get the thing out. (pic shows the sight already installed, but you get the idea).
![Image]()
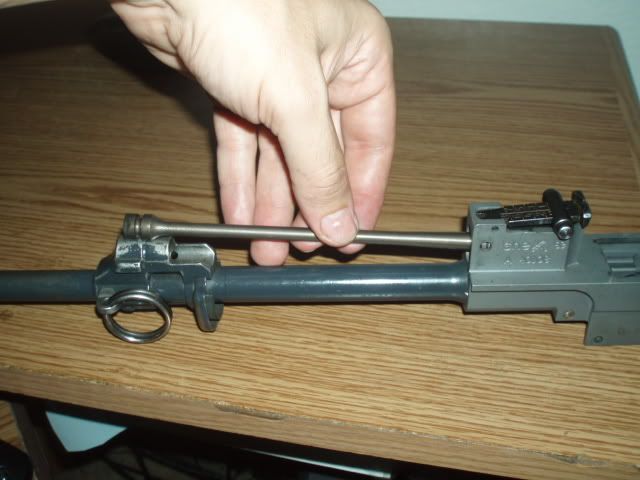
Next is to remove the barrel and gas piston stop from the receiver stub. This can be accomplished by using a press, and there are videos on youtube of this process. But basically, you just load it up in your press, and press the barrel out. Of course, you must press out the barrel pin first. A solid surface, a good punch, and a heavy hammer should be all that's needed to get the pin out.
I had to cut slits down the side of my receiver stub to allow the barrel to press out. It's crude, but it works, just be careful not to cut into the barrel itself. I grazed mine with a dremel, but not anywhere close enough to do any serious damage.
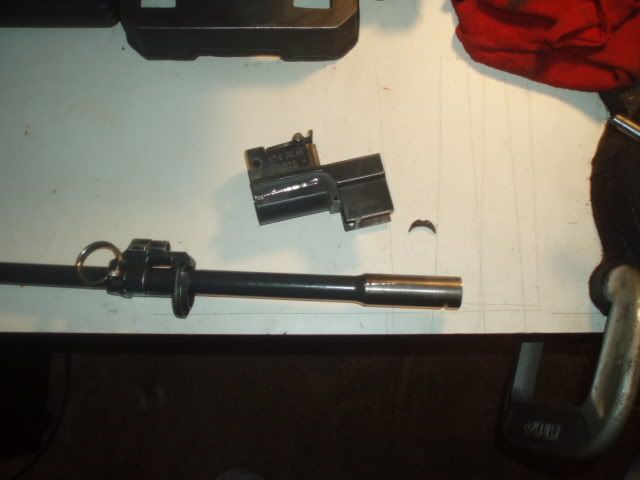
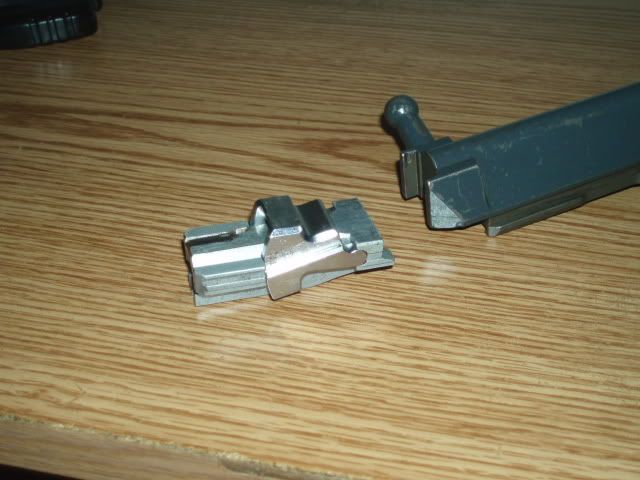
In this photo, you can see the barrel, the receiver stub, and the crescent-shaped piece, which is the gas piston stop. Once the barrel is out, the gas piston stop will drop out from inside the rear sight base. This is an important piece, and you do not want to lose it. One thing that is NOT shown in this pic, is the gas piston return spring. It can be found in the rear sight base, and you can pull it out after removing the piston, or waiting until the barrel is out. Either way, you will want to transfer it to your new receiver.
![Image]()
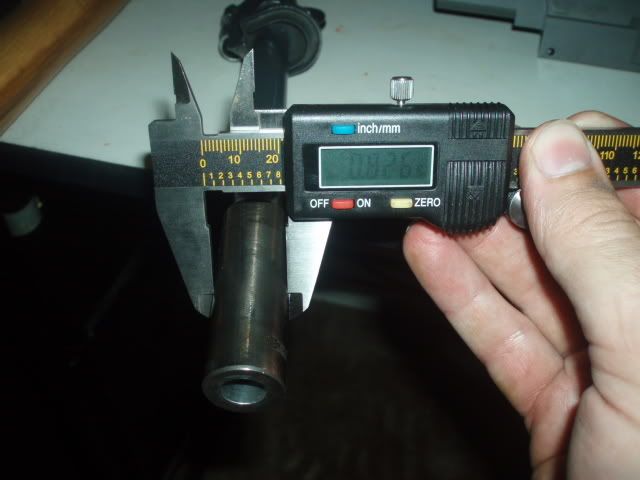
Now that the barrel's out, you will want to measure it, or at the very least, test-fit it into your receiver. There have been cases with barrels simply sliding into receivers, and not being a true "press fit". You do not want this. You want your barrel to be as tight as possible.
Measure the receiver
![Image]()
and measure the barrel. The barrel should be just a slight bit larger than the receiver. This will create a true press fit.
![Image]()
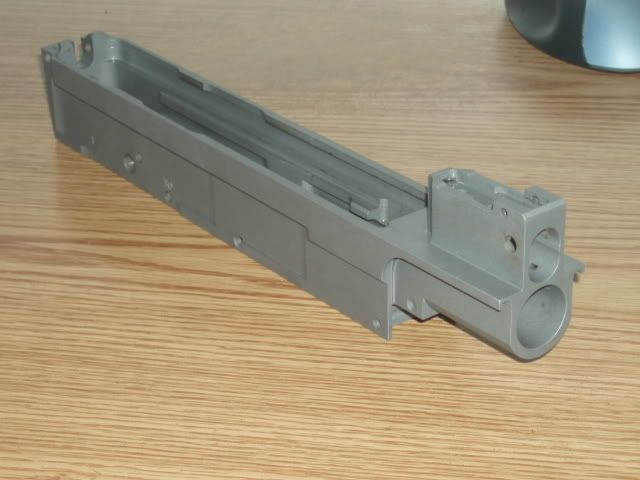
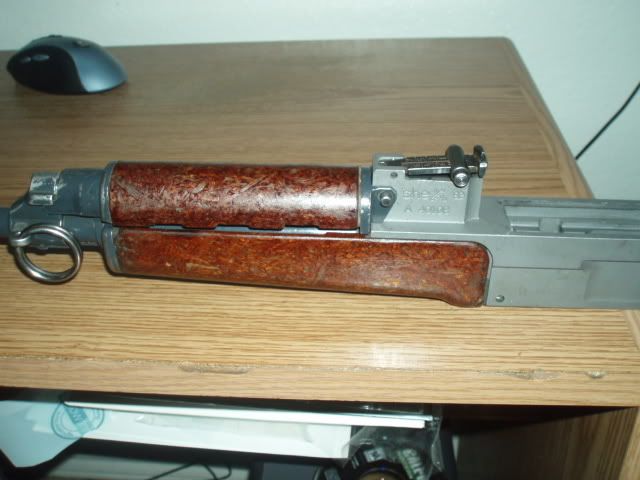
Here's a receiver pic before adding the parts
![Image]()
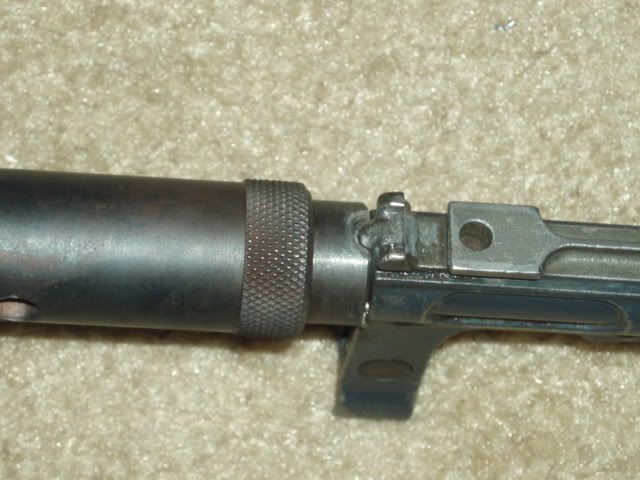
So now to begin putting the pieces back together. Unless you are going the SBR route, you will need to permanently extend your barrel before installing it back into your new receiver. There are many methods of doing this, such as welding, blind pinning, or silver soldering. There are also many options for barrel extensions and muzzle devices. The one I am using came from Ohio Rapid Fire. I simply welded it on with a quick bead between the bayonet lug.
![Image]()
Next step is to press the barrel back in. Before you install the barrel, you MUST install the gas piston stop--the crescent-shaped piece shown in a pic above. You may have to make some modifications to it to get it to fit into your receiver, but that's just the way it is. It will insert through the barrel opening, and into a small slot in the rear sight base. It's very easy to see how it fits in. I used grease to hold it in place. I also smeared grease all over the inside of the barrel channel on the receiver.
To press in the barrel, I got it started by hammering it in just enough to make it stick in and not fall out--maybe 1/4" or so. Then I used a straight edge to measure the front sight post to make sure everything was straight. If it wasn't, I'd lock it up the barrel in a vice, and lightly tap the receiver over until things were perfect.
Once the sights were lined up, I put it in my press and began pressing it in. Once the barrel gets about 3/4 the way in, you will want to place the bolt and locking piece into the receiver, and lock the bolt in place. Then continue pressing the barrel until it FIRMLY stops against the bolt face. Take your time on this, as it is very important to get right the first time.
Once the barrel is in place, you get soemthing like this:
![Image]()
So now it's time to start adding parts back into the receiver. I am following ORF's method of cutting the leaf-spring. The original spring looks like this:
![Image]()
And I cut off the right-side spring. This is the spring that would be used with the full-auto parts. And since my rifle cannot use those parts, this piece can be removed, to get something that looks like this:
![Image]()
Next is the trigger guard. If you ordered US FCG parts from Ohio Rapid Fire, those parts will also include the necessary rivets for installing the trigger guard.
Front rivet installed:
![Image]()
For the rear rivet, I had to drill out the opening just enough to accept the larger rivet.
![Image]()
I then placed the spring over the rivet, and smashed it down. This is how it was shown on ORF's website, however, it is NOT necessary to rivet the spring to the receiver. You can lay the spring on top of the rivet and it will be held in place through other means. You can decide what you want to do at this step
![Image]()
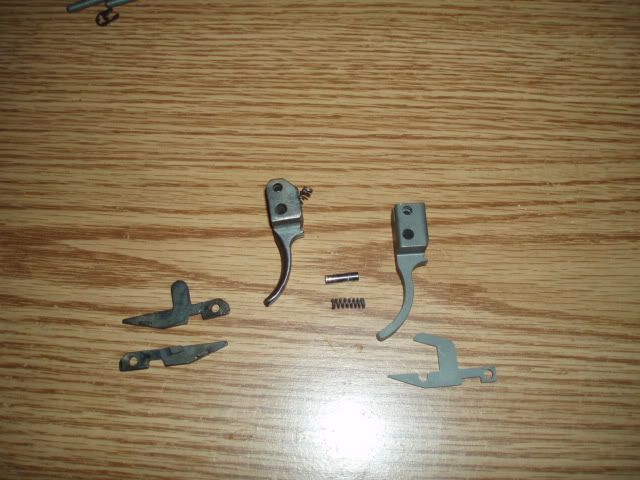
Next up is the trigger. You will need to take the pin and one spring from your kit trigger, and transfer those over to your US parts. The pin simply drives out, and parts fall off. Take one spring and slide it into the channel on your US trigger. Then install your US disconnector, and drive in the pin. On the left is the original trigger and disconnector, on the right is the US trigger and disconnector.
![Image]()
Next up is the sear. Take the roll pin that came with the US FCG parts, and install it into the left side of the sear. It will go in the smaller hole, and will be a very tight fit. It should not go all the way in--there should be a small amount protruding from the sear. This part catches the disconnector, and is what trips the sear to allow the striker to fire.
![Image]()
Once complete, it will look something like this:
![Image]()
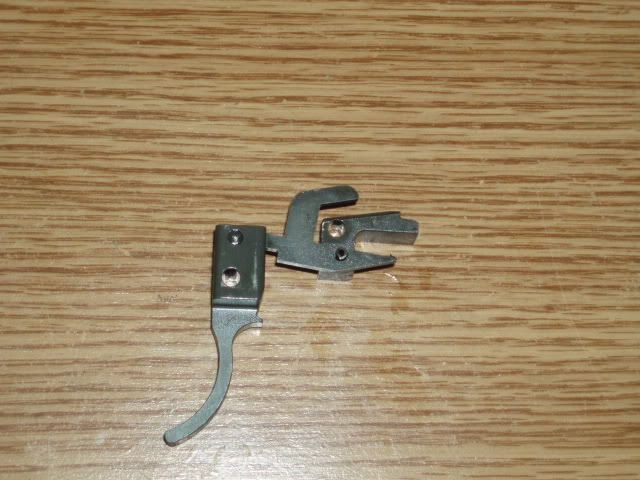
And they'll go together in the rifle kinda like this:
![Image]()
But we're not to that point yet. First thing is to install the pistol grip nut. It fits in like any AK, basically just drop it in. You can also attach the pistol grip if you want, or wait till later.
Now install the trigger. It simply drops into place, and is held with an axis pin that is supplied by Ohio Rapid Fire.
Then install the safety selector. You can modify yours so that "fire" is on the 1 position AND the 30 position, with "safe" being in the down position. But in it's basic configuration, using ORF parts, 1 will be "fire", while down and 30 will be "safe". To install the safety selector, use a long punch to press down the leaf spring. Then just slide the selector into place. It will be "kinda" locked into place by the leaf spring. The trigger parts will eventually hold it fully in place. You will have to wrestle with the disconnector to move it down and out of the way of the selector while it's being pushed into place. Once in place, the disconnector will ride in the groove on the selector.
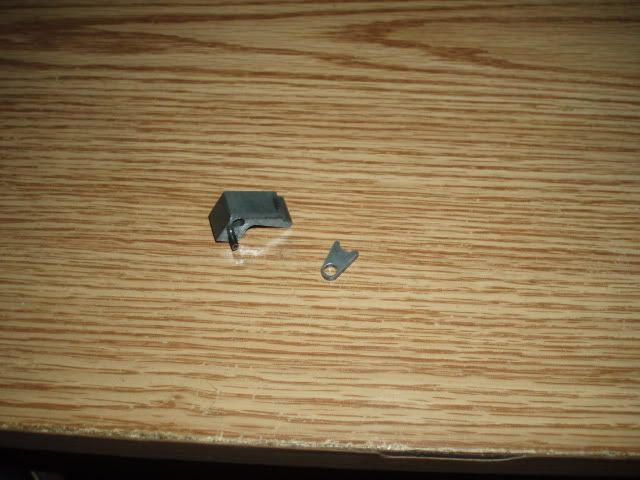
Next comes the sear and a tiny piece of metal called a safety lock. This piece acts as a spacer, and keeps the sear centered over the trigger.
![Image]()
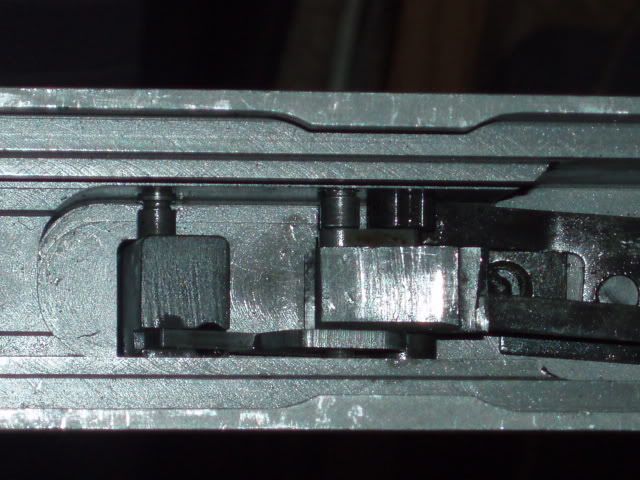
It can be a pain in the ass to get these pieces in, but they will go in something like this. Here you can see a top-down view of the trigger, disconnector, sear, safety lock, and selector. The axis pins will be held in place with e-clips.
![Image]()
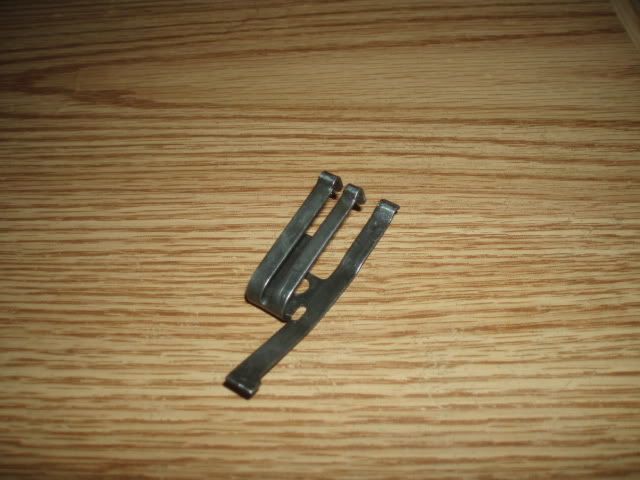
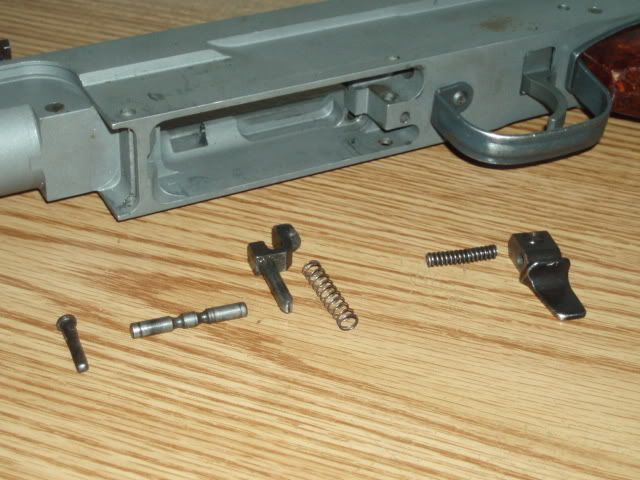
Next up is the bolt hold open, and magazine release lever. Here's the parts laid out. I realize some of the earlier pics show these parts already installed on the rifle. Not all of my pics were taken step-by-step.
![Image]()
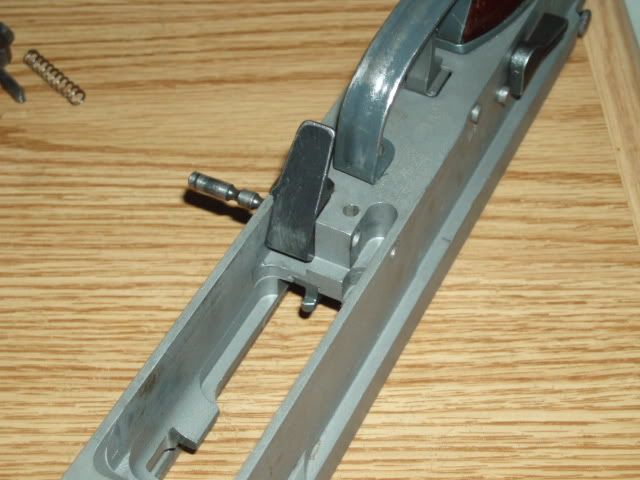
The mag release lever uses the stiffer spring, and I like to install it first. Push the pin just far enough in to hold the release lever in place.
![Image]()
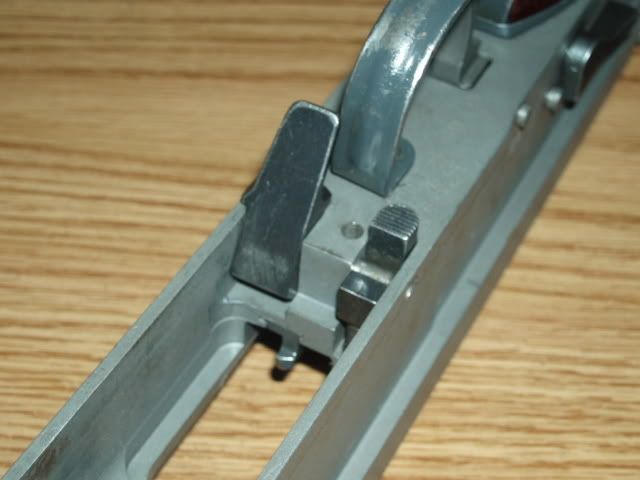
Then drop in the bolt hold open piece and push the pin all the way in.
![Image]()
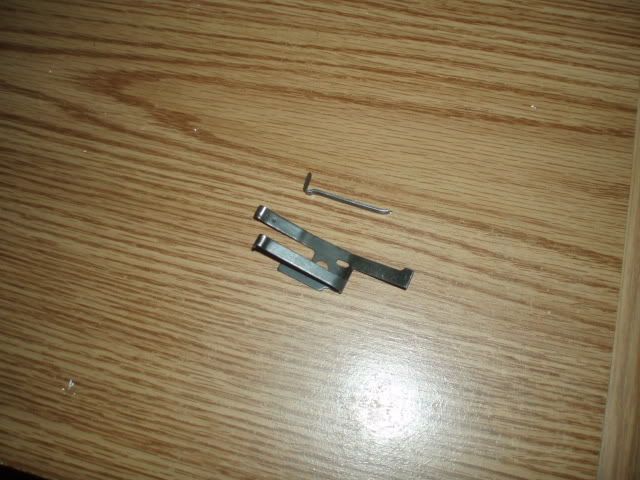
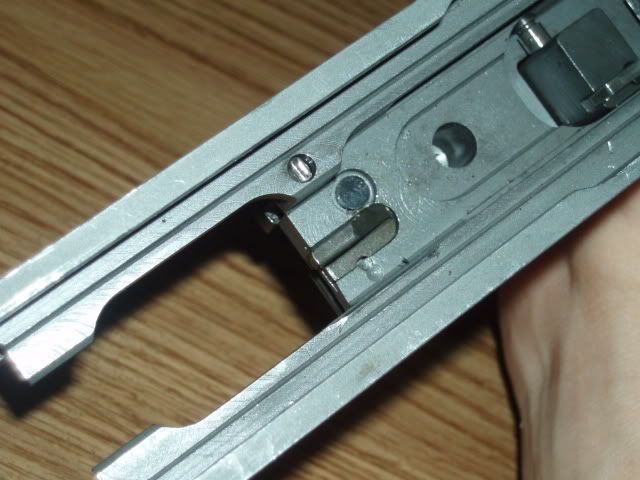
Next is a small retainer pin that keeps the larger pin from walking out of it's hole. It'll go in through the top of the receiver. Simply push it into place.
![Image]()
Then install the ejector. I staked mine in place using a punch and hammer.
![Image]()
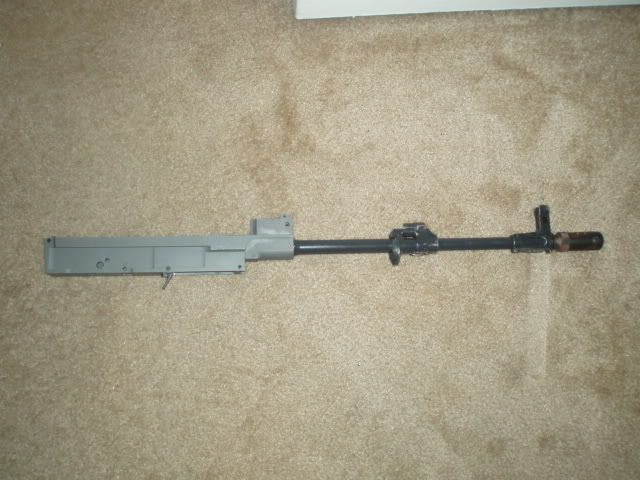
It's also a good time to pin the barrel. You can do this immediately after installing it. I put it off because I didn't have any decent drill bits at the time...
![Image]()
now install the gas piston. You'll need to install your gas piston return spring into the rear sight base as well. I don't have any pics, but it's self-explanatory. The spring must go in before the piston is put in.
![Image]()
gas piston installed
![Image]()
then the upper and lower hand guards
![Image]()
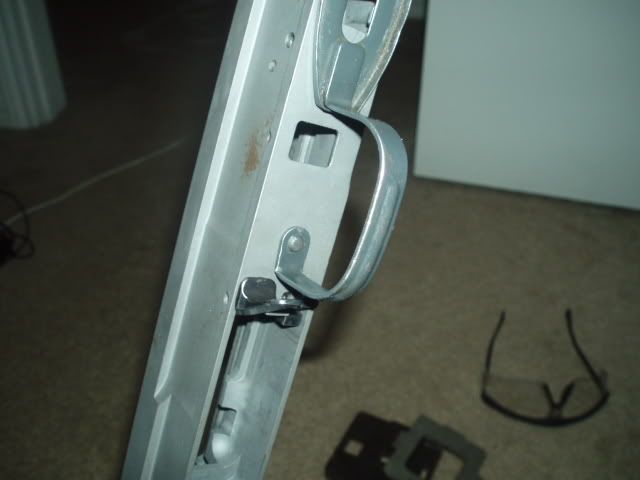
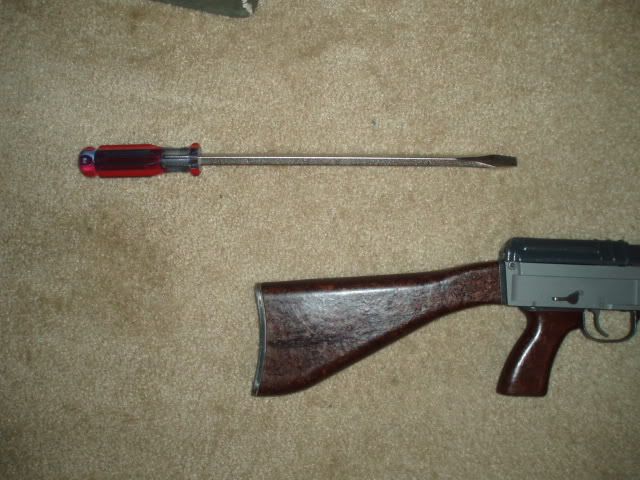
And the pistol grip and rear stock. I use a long screw driver to reach down inside the stock. There is a metal plate that mates up to the stock. This plate prevents the stock from rotating on the receiver. You will want to make sure it is installed before screwing down the rear stock.
![Image]()
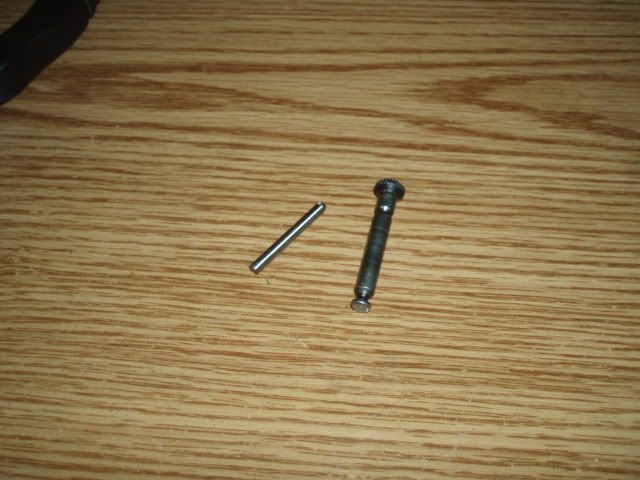
One thing that seems to be missing in most people's kits is the retainer for the top cover pin. Not having much to go off of, I simply made one ouf of a long punch that had roughly the same diameter as the pin's hole. I just cut it to the desired length, then turned a slight bevel on the tip.
![Image]()
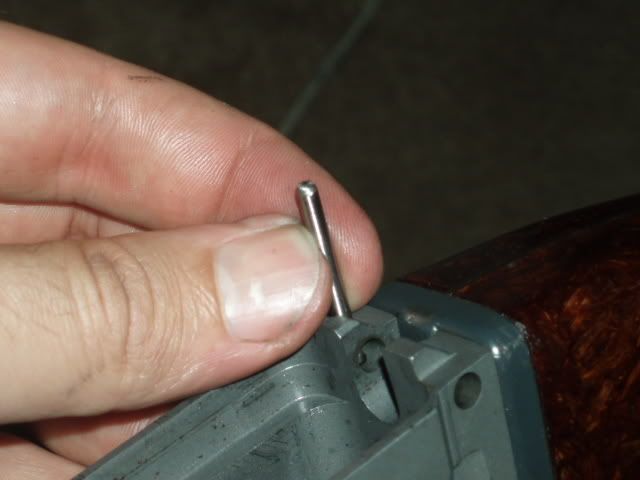
Drop it into the hole in the receiver
![Image]()
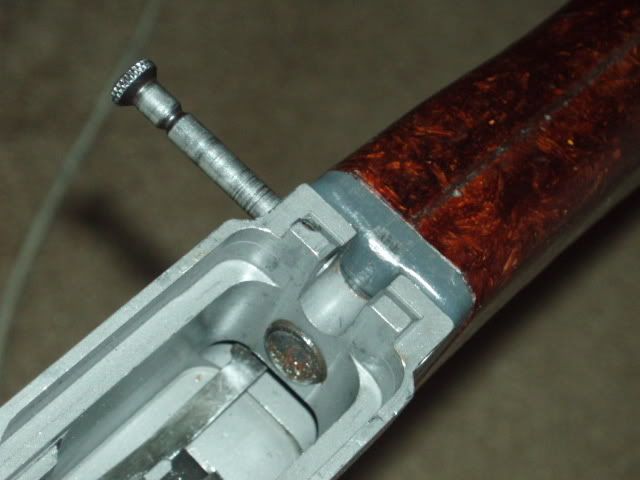
And there ya go! Now your top cover pin is securely held in place.
![Image]()
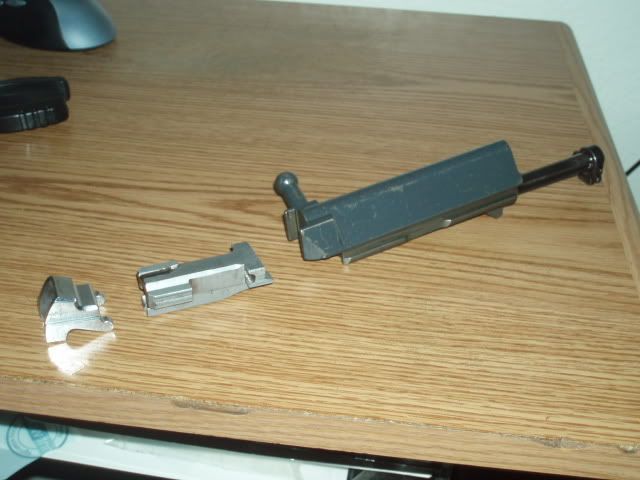
Now for the bolt. Here is the locking piece, bolt, and bolt carrier
![Image]()
Locking piece goes on the bolt
![Image]()
Bolt goes into the carrier
![Image]()
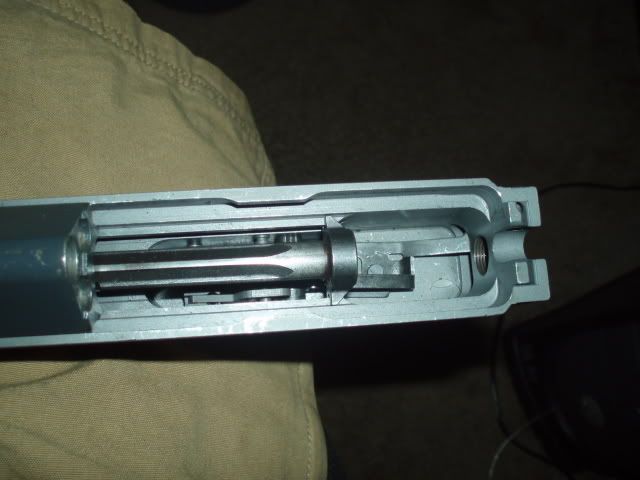
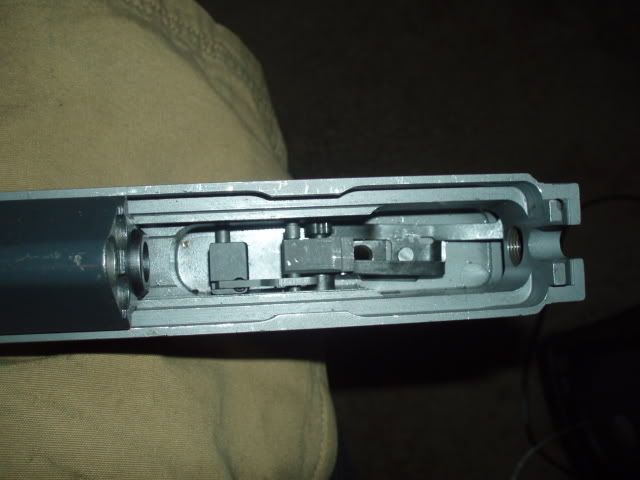
And the entire unit drops into the rear of the receiver, then needs to slide forward. At this point, the sear should engage the striker. After the bolt is fully forward, pull the trigger and move the striker forward to the "fired" position.
Striker in the "cocked" position
![Image]()
Striker in the "fired" position
![Image]()
Bolt and carrier fully forward and locked
![Image]()
Then place the top cover and springs on. The top cover is held in place with the retaining pin
![Image]()
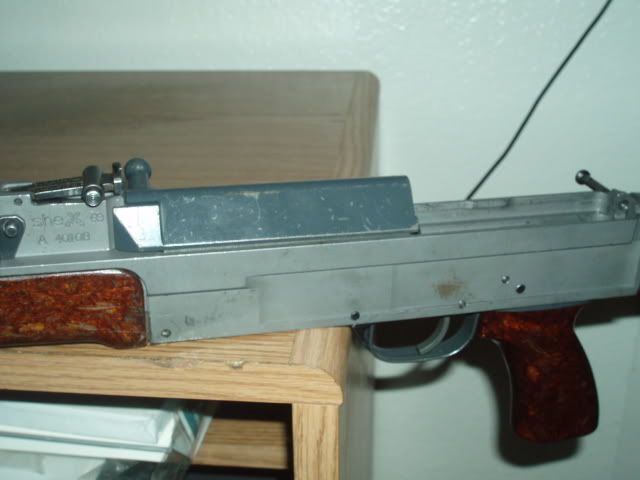
Done and done
![Image]()
So hopefully this helps anyone looking to put one of these rifles together. Again, I'm not a master, and I don't know everything, so I'm sure there's much to be added to this. So feel free to add additional information...
thanks.
This is simply the method I used to put my first VZ-58 together, so it was a learning experience for me. Take my experience and adapt it to use as you see fit. I am not claiming that it must be done exactly like I'm doing it, as with any build tutorial, your experience can and often will be a bit different. Feel free to add any additional information to this thread, as I am sure I have not covered everything in as much detail as some people might want or need. And keep in mind, this was my attempt at building one with very little info to go by, and just kinda made it up as I went along. My method is not set in stone, and should be adapted to fit YOUR individual needs.
The parts kit came from centerfire back when they were selling for 50 bucks
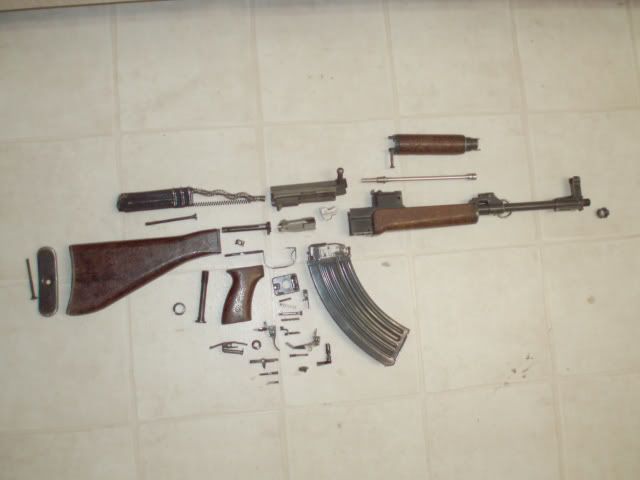
The first step I did was to remove the barrel, the gas piston stop, and the rear sight from the cut receiver stub.
To remove the rear sight, press the spring down, and pull the sight back and out--very typical to an AK. You'll want to support the stub in a vice or something, as it can take quite a bit of pressure to get the thing out. (pic shows the sight already installed, but you get the idea).
Next is to remove the barrel and gas piston stop from the receiver stub. This can be accomplished by using a press, and there are videos on youtube of this process. But basically, you just load it up in your press, and press the barrel out. Of course, you must press out the barrel pin first. A solid surface, a good punch, and a heavy hammer should be all that's needed to get the pin out.
I had to cut slits down the side of my receiver stub to allow the barrel to press out. It's crude, but it works, just be careful not to cut into the barrel itself. I grazed mine with a dremel, but not anywhere close enough to do any serious damage.
In this photo, you can see the barrel, the receiver stub, and the crescent-shaped piece, which is the gas piston stop. Once the barrel is out, the gas piston stop will drop out from inside the rear sight base. This is an important piece, and you do not want to lose it. One thing that is NOT shown in this pic, is the gas piston return spring. It can be found in the rear sight base, and you can pull it out after removing the piston, or waiting until the barrel is out. Either way, you will want to transfer it to your new receiver.
Now that the barrel's out, you will want to measure it, or at the very least, test-fit it into your receiver. There have been cases with barrels simply sliding into receivers, and not being a true "press fit". You do not want this. You want your barrel to be as tight as possible.
Measure the receiver

and measure the barrel. The barrel should be just a slight bit larger than the receiver. This will create a true press fit.
Here's a receiver pic before adding the parts
So now to begin putting the pieces back together. Unless you are going the SBR route, you will need to permanently extend your barrel before installing it back into your new receiver. There are many methods of doing this, such as welding, blind pinning, or silver soldering. There are also many options for barrel extensions and muzzle devices. The one I am using came from Ohio Rapid Fire. I simply welded it on with a quick bead between the bayonet lug.
Next step is to press the barrel back in. Before you install the barrel, you MUST install the gas piston stop--the crescent-shaped piece shown in a pic above. You may have to make some modifications to it to get it to fit into your receiver, but that's just the way it is. It will insert through the barrel opening, and into a small slot in the rear sight base. It's very easy to see how it fits in. I used grease to hold it in place. I also smeared grease all over the inside of the barrel channel on the receiver.
To press in the barrel, I got it started by hammering it in just enough to make it stick in and not fall out--maybe 1/4" or so. Then I used a straight edge to measure the front sight post to make sure everything was straight. If it wasn't, I'd lock it up the barrel in a vice, and lightly tap the receiver over until things were perfect.
Once the sights were lined up, I put it in my press and began pressing it in. Once the barrel gets about 3/4 the way in, you will want to place the bolt and locking piece into the receiver, and lock the bolt in place. Then continue pressing the barrel until it FIRMLY stops against the bolt face. Take your time on this, as it is very important to get right the first time.
Once the barrel is in place, you get soemthing like this:
So now it's time to start adding parts back into the receiver. I am following ORF's method of cutting the leaf-spring. The original spring looks like this:
And I cut off the right-side spring. This is the spring that would be used with the full-auto parts. And since my rifle cannot use those parts, this piece can be removed, to get something that looks like this:
Next is the trigger guard. If you ordered US FCG parts from Ohio Rapid Fire, those parts will also include the necessary rivets for installing the trigger guard.
Front rivet installed:
For the rear rivet, I had to drill out the opening just enough to accept the larger rivet.
I then placed the spring over the rivet, and smashed it down. This is how it was shown on ORF's website, however, it is NOT necessary to rivet the spring to the receiver. You can lay the spring on top of the rivet and it will be held in place through other means. You can decide what you want to do at this step

Next up is the trigger. You will need to take the pin and one spring from your kit trigger, and transfer those over to your US parts. The pin simply drives out, and parts fall off. Take one spring and slide it into the channel on your US trigger. Then install your US disconnector, and drive in the pin. On the left is the original trigger and disconnector, on the right is the US trigger and disconnector.
Next up is the sear. Take the roll pin that came with the US FCG parts, and install it into the left side of the sear. It will go in the smaller hole, and will be a very tight fit. It should not go all the way in--there should be a small amount protruding from the sear. This part catches the disconnector, and is what trips the sear to allow the striker to fire.

Once complete, it will look something like this:

And they'll go together in the rifle kinda like this:
But we're not to that point yet. First thing is to install the pistol grip nut. It fits in like any AK, basically just drop it in. You can also attach the pistol grip if you want, or wait till later.
Now install the trigger. It simply drops into place, and is held with an axis pin that is supplied by Ohio Rapid Fire.
Then install the safety selector. You can modify yours so that "fire" is on the 1 position AND the 30 position, with "safe" being in the down position. But in it's basic configuration, using ORF parts, 1 will be "fire", while down and 30 will be "safe". To install the safety selector, use a long punch to press down the leaf spring. Then just slide the selector into place. It will be "kinda" locked into place by the leaf spring. The trigger parts will eventually hold it fully in place. You will have to wrestle with the disconnector to move it down and out of the way of the selector while it's being pushed into place. Once in place, the disconnector will ride in the groove on the selector.
Next comes the sear and a tiny piece of metal called a safety lock. This piece acts as a spacer, and keeps the sear centered over the trigger.
It can be a pain in the ass to get these pieces in, but they will go in something like this. Here you can see a top-down view of the trigger, disconnector, sear, safety lock, and selector. The axis pins will be held in place with e-clips.
Next up is the bolt hold open, and magazine release lever. Here's the parts laid out. I realize some of the earlier pics show these parts already installed on the rifle. Not all of my pics were taken step-by-step.
The mag release lever uses the stiffer spring, and I like to install it first. Push the pin just far enough in to hold the release lever in place.
Then drop in the bolt hold open piece and push the pin all the way in.
Next is a small retainer pin that keeps the larger pin from walking out of it's hole. It'll go in through the top of the receiver. Simply push it into place.

Then install the ejector. I staked mine in place using a punch and hammer.
It's also a good time to pin the barrel. You can do this immediately after installing it. I put it off because I didn't have any decent drill bits at the time...
now install the gas piston. You'll need to install your gas piston return spring into the rear sight base as well. I don't have any pics, but it's self-explanatory. The spring must go in before the piston is put in.
gas piston installed

then the upper and lower hand guards
And the pistol grip and rear stock. I use a long screw driver to reach down inside the stock. There is a metal plate that mates up to the stock. This plate prevents the stock from rotating on the receiver. You will want to make sure it is installed before screwing down the rear stock.
One thing that seems to be missing in most people's kits is the retainer for the top cover pin. Not having much to go off of, I simply made one ouf of a long punch that had roughly the same diameter as the pin's hole. I just cut it to the desired length, then turned a slight bevel on the tip.
Drop it into the hole in the receiver
And there ya go! Now your top cover pin is securely held in place.
Now for the bolt. Here is the locking piece, bolt, and bolt carrier
Locking piece goes on the bolt
Bolt goes into the carrier

And the entire unit drops into the rear of the receiver, then needs to slide forward. At this point, the sear should engage the striker. After the bolt is fully forward, pull the trigger and move the striker forward to the "fired" position.
Striker in the "cocked" position
Striker in the "fired" position
Bolt and carrier fully forward and locked
Then place the top cover and springs on. The top cover is held in place with the retaining pin
Done and done

So hopefully this helps anyone looking to put one of these rifles together. Again, I'm not a master, and I don't know everything, so I'm sure there's much to be added to this. So feel free to add additional information...
thanks.